


Flash Animation! Wikipedia describes flash animation as, "an animation that is created with the Adobe Animate (formerly Flash Professional) platform or similar animation software and often distributed in the SWF file format." And I'm going to teach you how to make flash animations! I’ll teach you how to make a simple tween.
One thing you must know about Flash animation is that Adobe Flash/Animate will crash. A lot of times, so SAVE, SAVE, SAVE your work as often as possible. Files tend to get corrupted so make sure that you save it on a file hosting website (like Google Drive or Mediafire) before it gets corrupted. Note that I’ll be using “Adobe Animate” for this tutorial. Despite the fact that it’s a different version, most of the versions of Adobe Flash seem to work the same.
Okay, for this tutorial, we are going to be animating a simple ball bouncing animation with tweens. You can do this with hand drawn animation but animation simple shapes like squares and circles are much easier with tweens.
First, open up Adobe Animate, click on “File” then, “New” and then this’ll pop up.
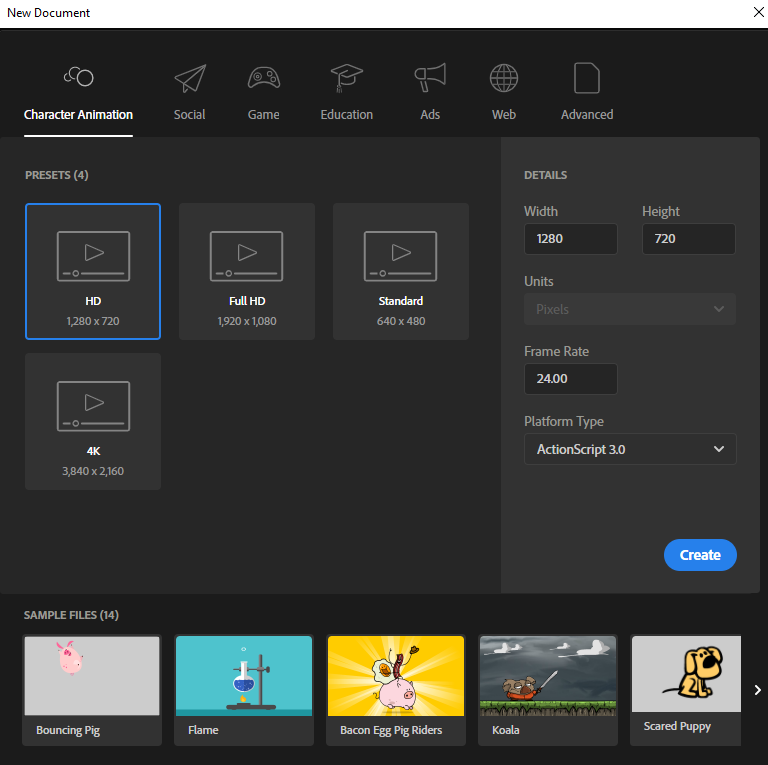
For this, click “HD” and then you set your Frame Rate to “24.00.” The frame rate is the amount of frames there will be in a second of the animation. The standard number most people use is 24.Like what Rebecca Sugar said, “Every second that you see is twenty-four connected pieces.” But feel free to experiment with higher or lower frame rates. But don’t set it to be too high or too low. Adobe doesn’t really like it when you do that. Then, after that, click create!
Then, you’ll be greeted by the REAL DEAL.
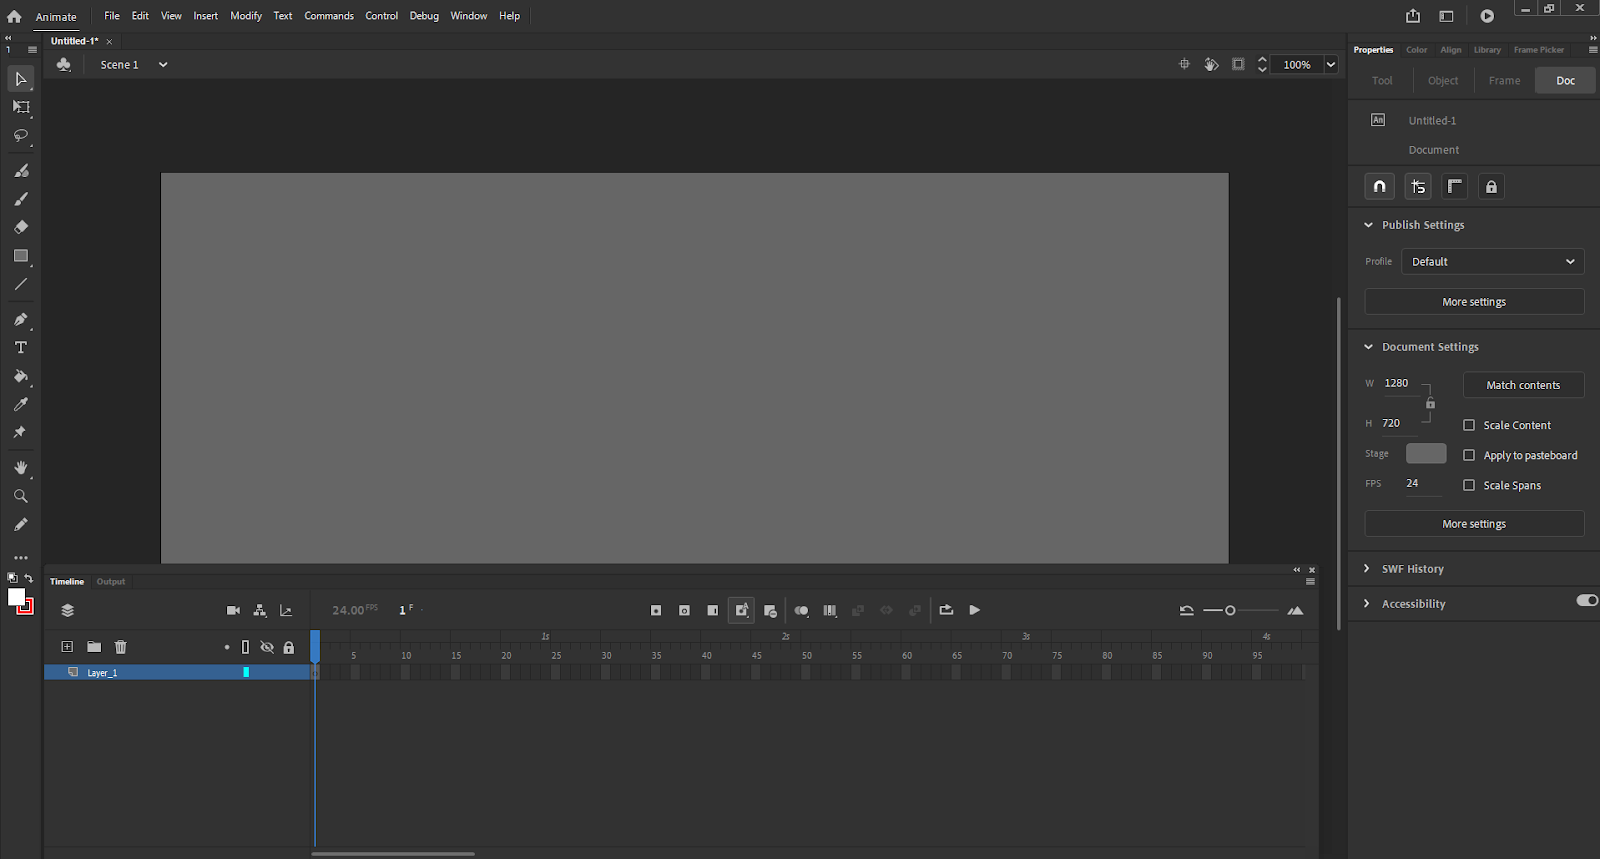
Your setup won’t look EXACTLY like this but you can arrange it anyway you like.
Okay, so, at the left side is your toolbar, you’ll be needing it for tools such as the paint bucket, paintbrush or the shape tool.
At the bottom is the timeline, it’s where the organisation of animation content will be, like layers, keyframes and normal frames.
At the right side is the more miscellaneous stuff like the properties bar, colours bar and the library bar.
If you’ve clicked on the paintbrush and drew a few squiggles, you would notice that this program works differently from other tools like Paint Tool Sai, Krita, Photoshop, ect. That’s because Adobe Animate uses VECTOR GRAPHICS! That means the art uses shapes instead of pixels and it can be resized without ever losing quality! Neato!
Next, you should click on the shape tool, drag it to resize the shape. After that, you should select the whole shape, right click and then click “Convert to Symbol.” You should see stuff that says whether you want it to be a graphic symbol and the name, keep the name as it is and click “OK.”
Tada! You’ve made a symbol! A symbol is a reusable element in an animation that you can reuse multiple times in an animation!
Next, you should see this in the timeline.

Right click the 25th frame and then click, “Insert Keyframe.” Next, at the 25th keyframe, you should drag the shape from the left part of the stage to the right part. In between these two areas, you should right click anywhere in-between the two keyframes and then click, “Create Classic Tween.” Click the “Play” button or press enter and you should notice that the shape moves smoothly between the stage.
But we want the movement to be more smooth. To do this, click any part of the purple part. Then, at the right side, you should see this. This is all of the settings for the tween.
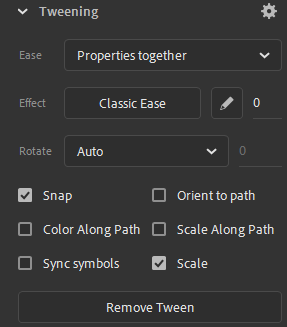
Click on “Classic Tween”, click on “Ease In Out”, and then you should double-click quad.
Now, press the “Play” button or press enter and you’ll see that the shape gets faster and then slows down near the end.
Congrats, you’ve made your very first tween! Tweens look pretty good after some practice and usage. Just keep at it and you’ll get there!
Thanks for reading! I’ll link some of my favourite animations that use tweening!
PLJerry
Tutorials how to use Flash I've seen on YouTube everyday, but BUT part of my animations were made in Krita, I know this news you wrote is for Tutorial Jam, but now I'm using Flash to do some animations for my friends or other projects I've got.